One of the wheels on my small trailer lost its bearings. They were badly deteriorated, and on a slow-speed run down our driveway, the wheel just started spitting bearing parts out onto the grass. It was pretty ugly, and the wheel was just clunking around on the axle. I took the wheel off the axle, and it was undamaged. The axle looked OK as well, so I decided to just replace the bearings and put it back on. While I was at it, I decided to replace the bearings in the wheel on the other side as well. That one had given me no trouble, but bearings are cheap, and as long as I was getting into the project anyway, I wanted to be sure both were good.
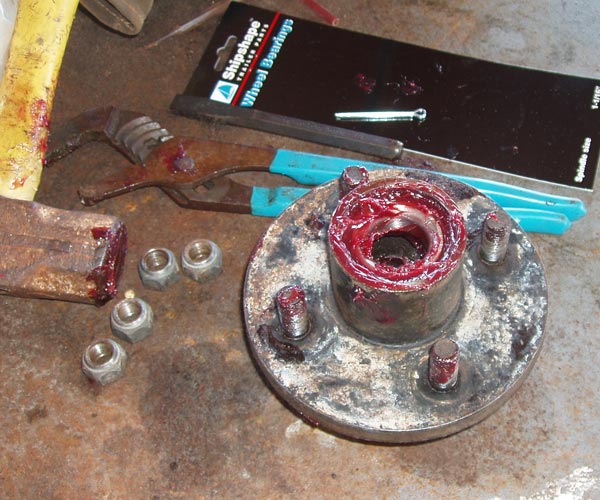
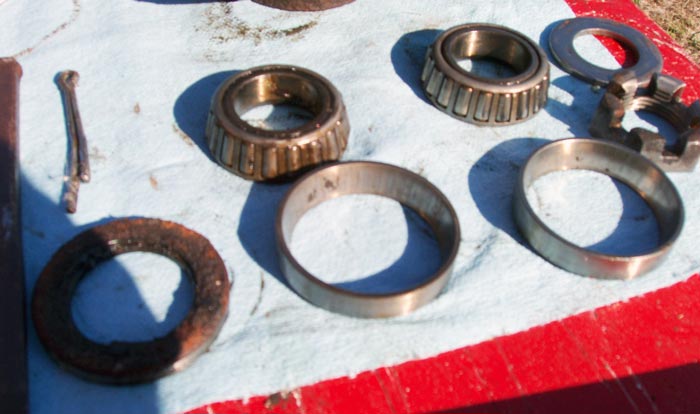 (From left) The old cotter pin and inside (soft) seal, the inner and outer bearings and races, and the washer and nut that hold it all on the axle
When we removed the wheel from the axle and pounded the bearing races out, we saw some pitting in the races. The photo at left shows the old cotter pin and inside (soft) seal, the inner and outer bearings and races, and the washer and nut which hold it all on the axle. If you look closely at the bearing races, you can see little black spots on them. The races should be completely smooth, and those "spots" are little cavities that make the surface uneven. This is the beginning of the end for these races, and it's good I decided to replace them. These were over 10 years old, but had very few miles on them.

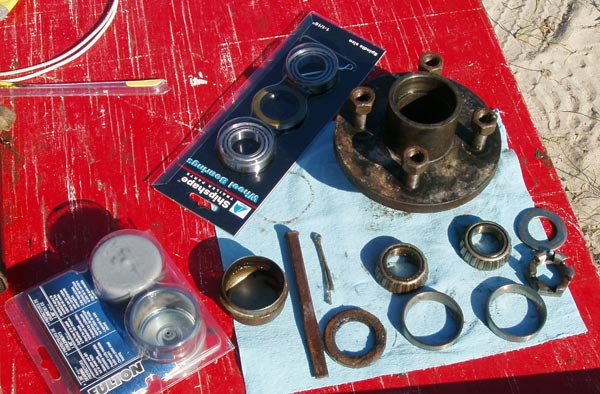 This photo shows the old bearings again, along with the new ones. Also shown is the old dust cap and the new set of "bearing buddy" caps I will install once the wheels are mounted on the axle.
This next photo shows the old bearings again, along with the new ones. Also shown is the old dust cap and the new set of "bearing buddy" caps I will install once the wheels are mounted on the axle.Bearing buddies are dust caps that have a spring-loaded grease piston built into them. You pump grease into the fitting and it fills the cylinder, forcing the cap outward and compressing a spring. Once it is full, the spring gradually forces grease through the wheel, maintaining lubrication.
The spring also creates pressure on the inside of the soft seal. That is very important because when you back a trailer into the water, the pressure increases as the wheel gets deeper under water. Water pressure forces water past the soft seal and into the inner bearing. If it is salt water, it will corrode the bearings and races, and will make removing the damaged bearing race a real chore. It is important to make sure the bearing buddy is pumped full of grease so that the spring is compressed before backing a trailer into the water.
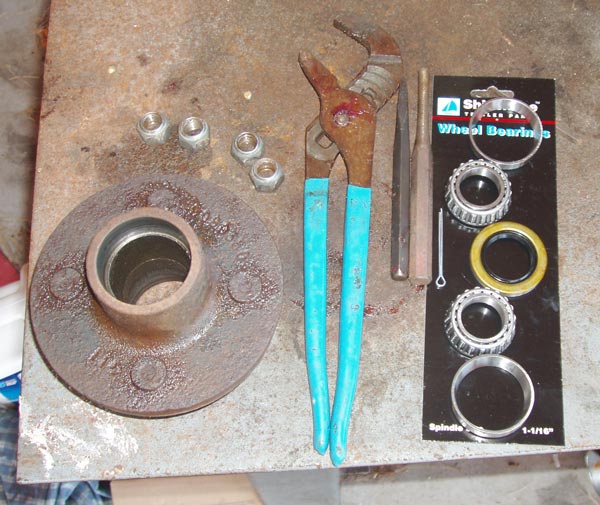 After the wheel has been cleaned out, you can see the lip an inch or so inside which holds the bearing races in place.
This image shows the wheel after it has been cleaned out. You can see the lip an inch or so inside which holds the bearing races in place. Before installing the new race, grease the entire inner surface and the lip. Put some grease on the new race and tap it into the wheel until flush, then tap it all the way down until it stops. If you have a bearing race and seal driver, it is easy to drive the bearing races evenly. Lacking one, we just tapped it with a punch, working evenly around the edge.Once the races are installed, pack the whole thing with lots of grease and grease the new wheel bearings. New bearings need grease squeezed into each cylinder so that the whole thing is covered, inside and out. Once it is fully infused with grease, slide the inner bearing in place and pack in more grease on top. Grease the new inner soft seal and tap it into the wheel. Once again a wheel bearing race and seal driver will prove useful, but you can just gently tap with a mini sledge hammer, which is what we did.
 The inside of the wheel after the new race, new bearing, and soft seal have been put back in place.
This photo shows the inside of the wheel after the new race, new bearing, and soft seal have been put back in place.With the inside complete, grease the new outer bearing race and squeeze grease into the new outer bearing. Lay the new bearing in the bed of grease and slide the whole assembly onto the axle.
 The outside of the wheel with the new bearing sitting in the race. It is now ready to go back on the axle.
This next photo shows the outside of the wheel with the new bearing sitting in the race. It is now ready to go back on the axle.
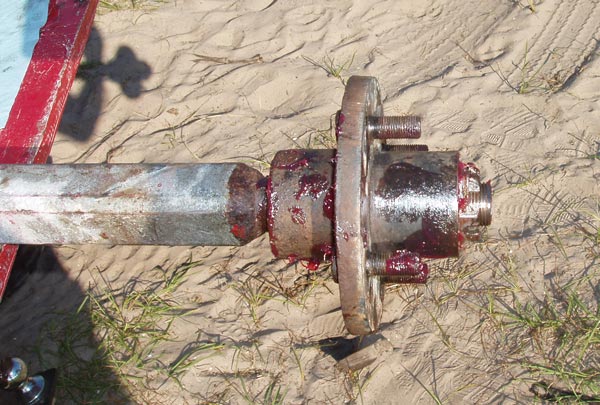 The wheel mounted back on the axle. Slide the retaining washer up against the bearing face and screw the nut onto the axle. You should be able to tighten it by hand until the wheel is more or less in the right place, then tighten with a wrench.
This last photo shows the wheel mounted back on the axle. Slide the retaining washer up against the bearing face and screw the nut onto the axle. You should be able to tighten it by hand until the wheel is more or less in the right place, then tighten with a wrench. It is important that the nut not be too loose nor too tight. The wheel should roll easily, with very little wobble when you try to move it sideways.
To make sure it is properly seated, one method is to tighten it a little too far, until the wheel gets a bit hard to rotate, then slowly back off the nut while rotating the wheel. Stop when it becomes easy to turn the wheel again, and insert the cotter pin to lock the nut in that position.The last step is to grease the lip of the bearing buddy and tap it into place on the end of the wheel. Use a grease gun to pump the bearing buddy full of grease, and the wheel is ready for use. A new set of bearings will initially require frequent refilling of the bearing buddy piston, as air works its way out of the area and is displaced by grease. Once that process is over, the need for reapplication of grease to the bearing buddy is less frequent.
This video shows my neighbor installing my new wheel bearings on my jet ski trailer axle while I held the camera. It helps to have good neighbors!
Excellent explanation. This exlaipns the references I’ve seen regarding the inner’ and outer’ pockets. Apparently you can get another set of ball bearings from 1UP to increase the resistance further by filling all six pockets.I’ve also seen some discussion of how later models use an alternate braking surface instead of felt. There was some indication that the felt would actually stick to the aluminum if it got hot enough (your photo B may be some indication of the veracity of this claim).I agree that this is very elegant. I’m going to see if I can pick up one of these used.