 My old storm sail from a previous sailboat was the right size to use as a jib for my Adventure Island. There's a reason I save everything.
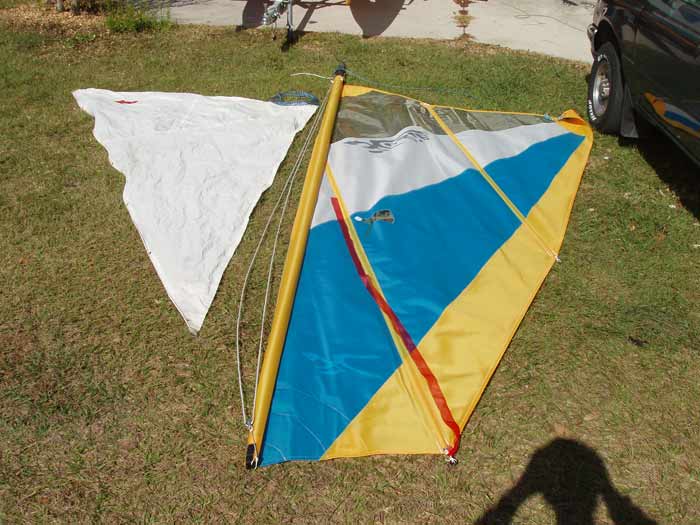
Although my Hobie Adventure Island trimaran sailing kayak is fast and fun, in light winds it is never quite fast enough, so I decided to add a jib to the boat.
I happened to have an old jib of an appropriate size lying around. It was a storm sail, so the fabric is really too heavy for a jib intended for use in light winds, but it was sitting in my shed, so it got the job.
For my first experiment, I just rigged things very simply, making no new holes in the boat and attaching no permanent hardware. I wanted to see if I liked it, and decide if it was worth the trouble, before getting out the drill.
I went out in very light winds for a test sail, and my brother came along in another Adventure Island and shot this video:

 For the jib halyard, I just tied a short line with a loop around the fitting in the top of the mast that holds strap on top of the mainsail. At the end of the line I hung a small Harken block. The halyard passes through this block.
I decided I did like it enough to drill at least a few holes, so today I got around to making some permanent changes to the boat to accommodate occasional use of the jib. I wanted to be able to deploy and retrieve the jib without leaving the cockpit, and wanted it to not interfere with normal sailing with just the mainsail. Here is the setup I developed.For the jib halyard, I just tied a short line with a loop around the fitting in the top of the mast that holds strap on top of the mainsail. At the end of the line I hung a small Harken block. The halyard passes through this block.
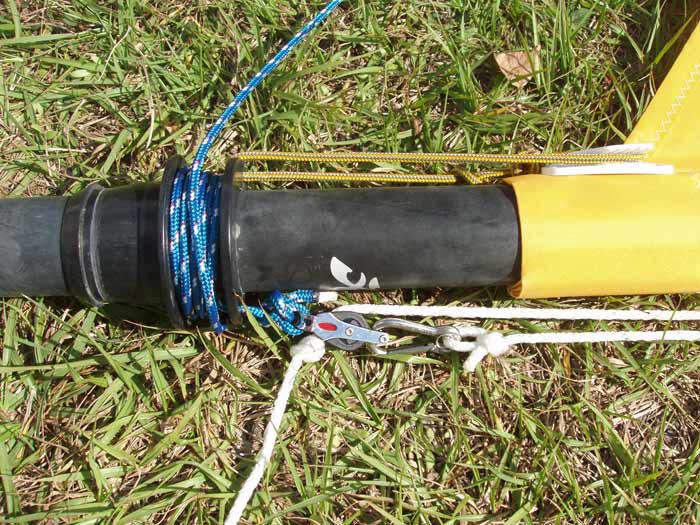
At the lower end, I replaced the mainsail furling line with a somewhat longer one and tied a small block with becket to the end that is passed through the hole. I used a becket block so that I could clip the end of the halyard back to the same block when it was not in use. That way, the jib halyard just rolls up inside the mainsail when it is furled, and does not interfere with furling. To prevent the working end of the halyard from escaping, I put a figure eight knot in the end. I trimmed the extra line off right at the knot after the picture was taken.
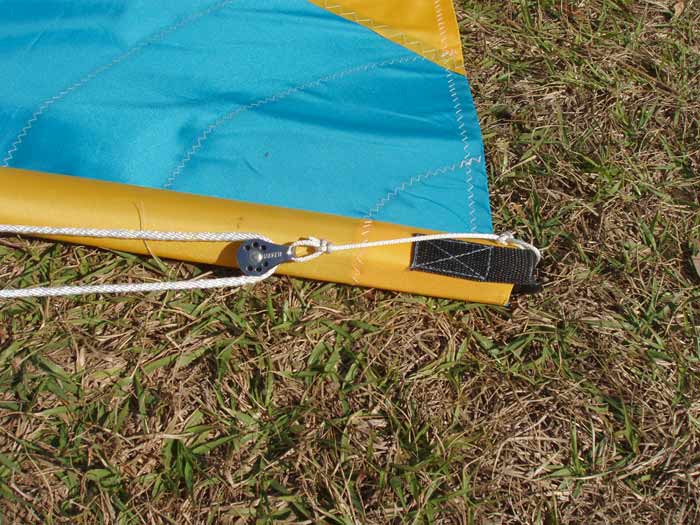
I rigged a tack line so that I could pull the tack of the jib out onto the foredeck prior to raising the sail. This will stay on the boat all the time, as it is not in the way and does not interfere with anything. It also doubles as a docking line when needed.
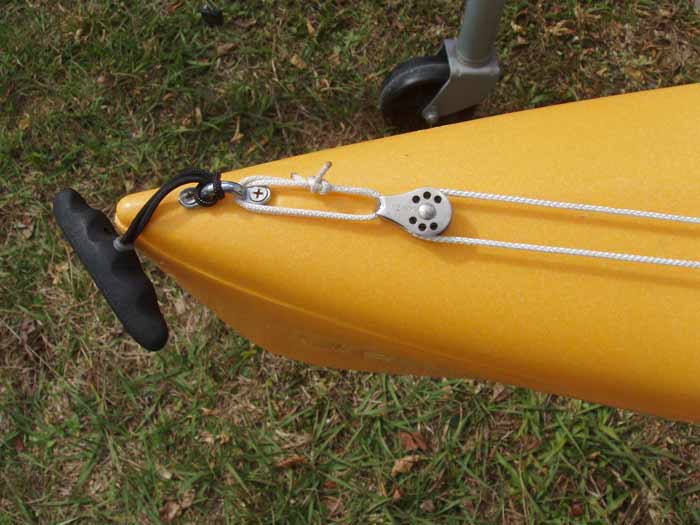
At the bow, I just made a double loop of line through the bow eye and a small Harken block, tied back to itself with a sheet bend.
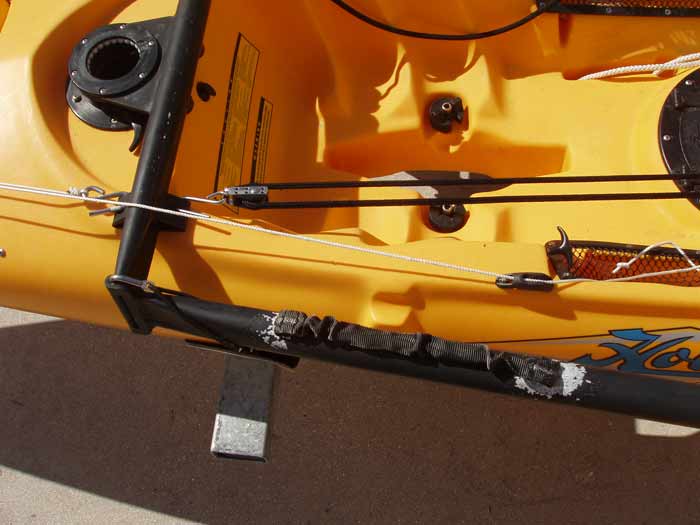
Back in the cockpit, I installed a small jam cleat along the port side coaming. This makes it easy to adjust the height of the sail off the deck, and easy to fully release the tack line if winds suddenly come up and I want to unload the jib. This type of jam cleat with this thin line will also release itself if pulled hard enough, so it's kind of a safety valve. However, it takes quite a tug to make it release, and I'm not sure it is the weakest link in the system.
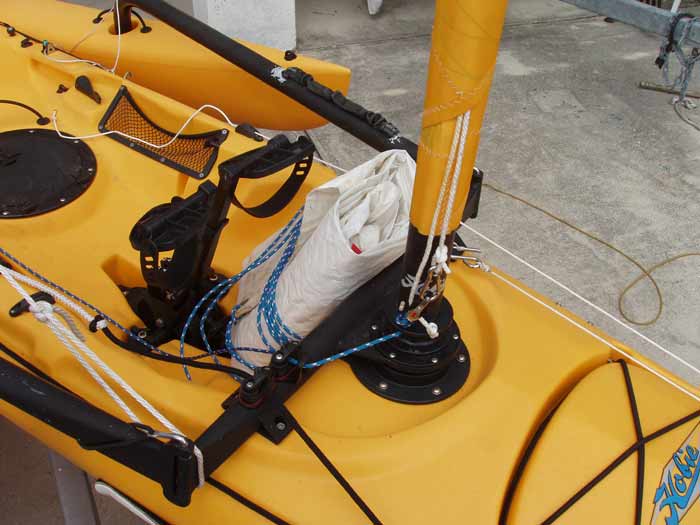
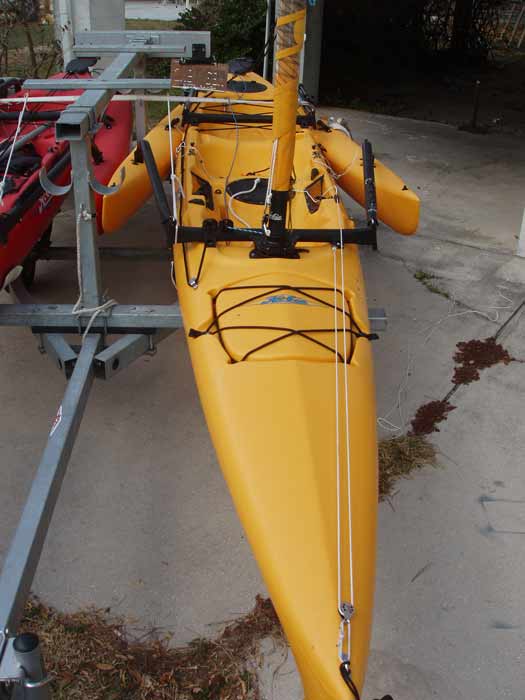
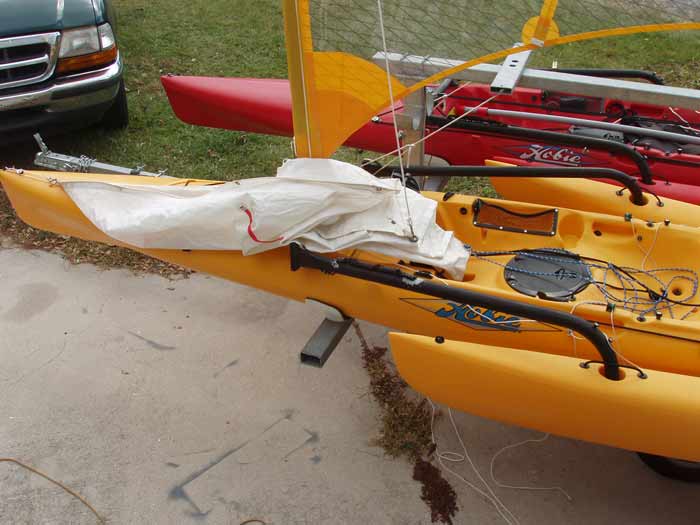
With the jib flaked and then rolled and the jib sheets rolled around the sail, I can stow it against the bulkhead just forward of the Hobie Mirage Drive. It looks like it would interfere with pedaling, but it does not. If I don't decide to use the jib, it can just stay there and I can sail and/or pedal the boat normally.
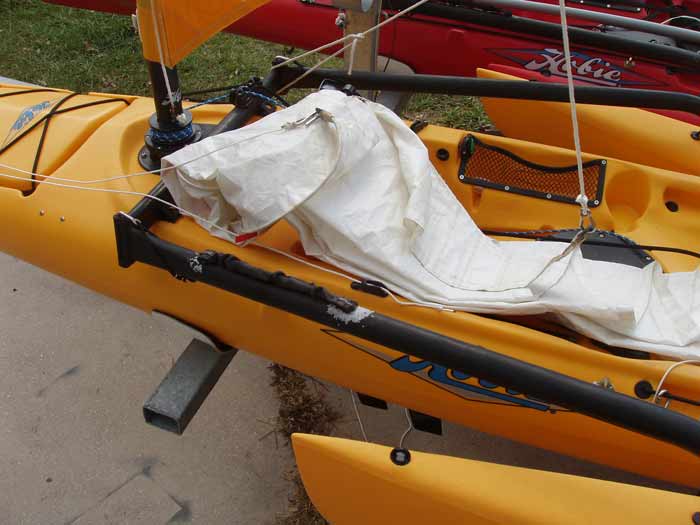
When I want to sail with the jib, I unroll the sheet lines and roll out the sail along the downwind side of the boat. I have to scoot forward in the cockpit to retrieve the tack line and the jib halyard and then bring those back and hook them onto the jib. While I'm up there, I pass one jib sheet forward around the mast to the windward side. That one will be the lazy sheet to start out. I did not do that before taking this picture.
Once the tack and halyard are hooked up, I can pull on the tack line to draw the sail out onto the foredeck. I can still reach most of it at this point, so I can keep it out of the water.

A quick tug on the halyard, and I have the jib up! In this picture, the end of the halyard is secured to the tiny cleat on the bulkhead just underneath the mast base.

I did not want to have to scoot forward to secure the halyard, and really did not want to have to scoot forward to release it if the need suddenly arose. To solve that problem, I mounted a small cleat on the 8" deck hatch just in front of my seat. The idea is that the halyard will be led from the block on the mast, in between the Mirage Drive pedals, and be attached to this cleat. I have not yet tried it.
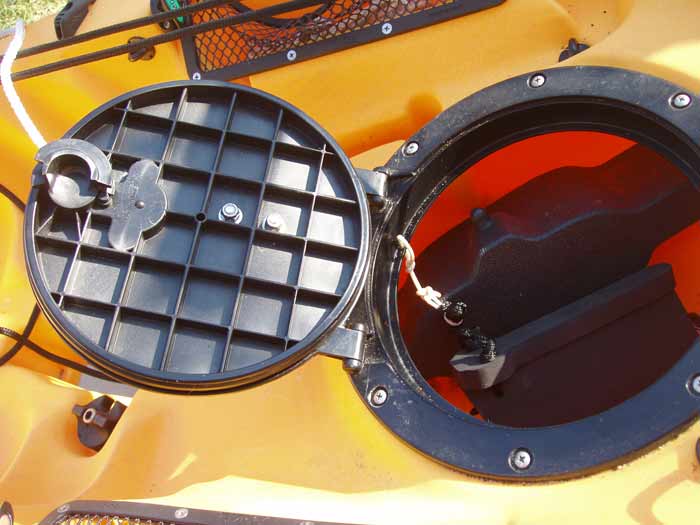
The cleat is attached to the hatch lid with stainless machine screws and locking nuts, with a couple of washers to help distribute the load. I doubt the designers of this hatch ever imagined this kind of stress on it, but it's mostly a shearing load, and it's a sturdy hatch that I routinely stand on when entering the boat.I have succeeded in making a simple boat complicated. Now six lines control the two sails, instead of two lines controlling one sail. Yippee! More stuff to mess with out on the water!
Checkout some of these kayak jib furling ideas. There are a lot of advantages to furling, and it’s pretty easy to rig. My Hobie Forum username is 69cpu. Here’s a link to the article. My boat is the inflatable. Maybe you’ll get some ideas.
http://www.hobiecat.com/community/viewtopic.php?f=32&t=10791&start=15
Tom Ray, you get first prize! I thought I was nutso bec. of all the mods I do on my boats. If one has an engineering mind (unfortunate folk!), then a simple design becomes a complex Rubik’s Cube of tangled tasks.
I LOVE your Sun Cat improvements, you maniac. Do not be flattered though… this admiration is coming from one like you. It’s like having OCD for boats… not an acquired illness – it’s in the genes.
Love it all,
Vicki
I followed your design to add a jib to my AI but found if I was caught out in a sudden gust, lowering and retrieving the jib was a real problem as I tried to fold it. To make things easier I made a furler which to my surprise worked well, but unfurling was a problem until I inserted a 10mm fibreglass luff spar into the jib and changed my home-made furler to an endless loop type. The jam cleat is used to ‘lock’ the endless line so that the jib can be reefed to any desired size. When fully furled, the jib can be lowered down the port side out of the way unless it is intended for use later. Once the jib is disconnected from the halyard, if required the main can be reefed according to conditions. The whole set-up works a treat. Love your video on ‘route 101 with Whimsey…
Cheers Ian
hi guys ive done the same thing i use the hobie outback sail its not bad at all its very good in light wind sailing i have more power 10 knots is ideal jib in heavy winds you’ll break the mast thats not a good look ha regards pete