 Discussing Aluminum Work
August 1, 2011
Contracting Build of New Aluminum Top Frames
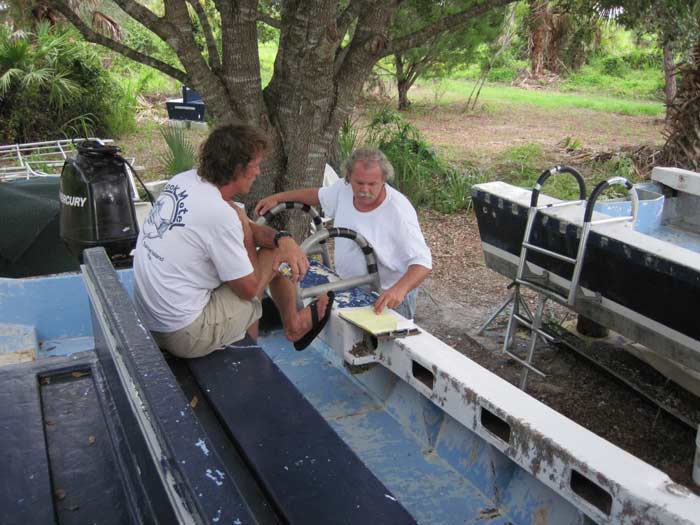
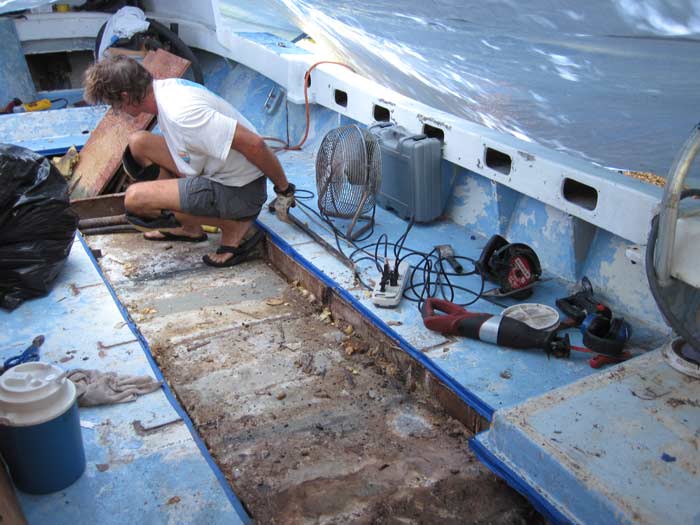
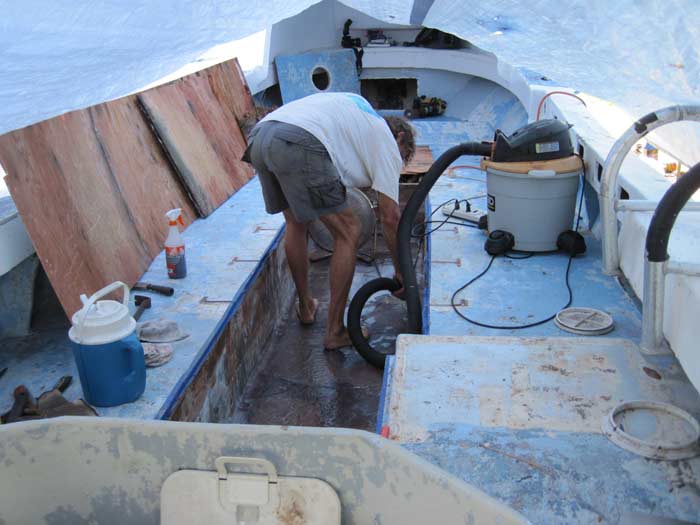
After returning the pressure washer to Punta Gorda Rent All on Monday morning, Gene ran a bunch of errands, bought a gallon of West Systems epoxy, and made some contacts regarding outboard engine replacement, aluminum fabrication, fuel tanks and other needed boat parts. Nothing got done on the boats themselves, but it was a productive day all the same. This picture shows Gene discussing aluminum work with local welder Richard. He is going to give a quote on replacing the canopy top frames, replacing the dodger grab rails, and possibly upgrading the boarding ladders and adding configurable seating to the interior of the boat. The idea they are drawing up is a plan to have bench seats in the center as before, but make them also fit along the sides of the boat, or just off the boat entirely, depending on the job at hand. Some of the camera crews have very bulky equipment, such as Luis' 3D underwater video camera shown in my whale watching trip report. If several of those things are aboard, it would be best if the seats were just left at the dock!
 Backhoe Scratch
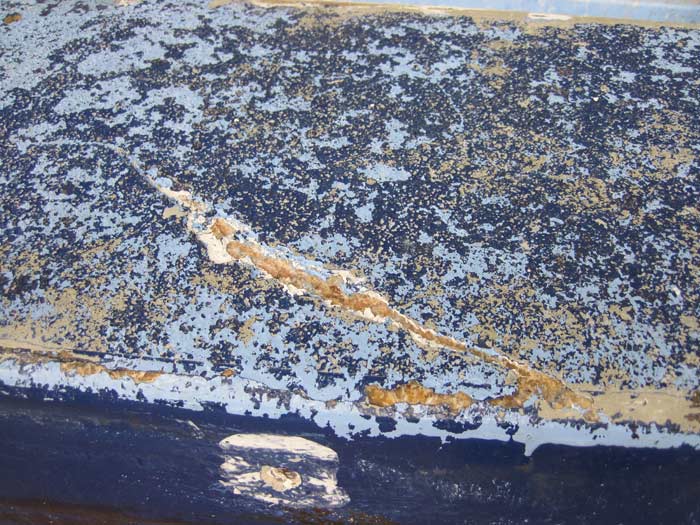
This picture really belongs back among the July entries, but I did not get around to photographing it until August 1st. It shows the small scratch where I grazed the gunwale of Pec with the backhoe claw. The bad part of this scratch measures about 8 inches, and the whole thing is about 12 inches from where paint damage starts. This really is about as gentle an accidental nudge as I could give a boat with that backhoe claw. If I mess up just a bit more, the weight of the claw and arm comes down on the boat. I do not know what it would do, and hope we don't find out along the way!

 Tarps Over Boats
August 2, 2011
Covering Boats With Tarps & Cutting Fiberglass Deck Skin
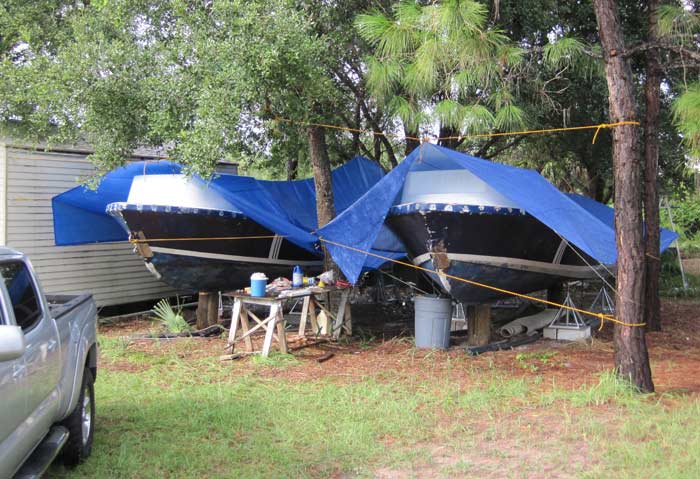
We were about to begin at least exploratory cutting on Pec, and decided it was time to put tarps over both boats. Thunderstorms happen almost every day at this time of year, and we were going to cut open pieces that need to stay dry. The tarps also catch the leaves that were accumulating in the boats daily. We strung them from surrounding trees and my shed, which worked out OK for the most part, but the one over Pec is pretty low.
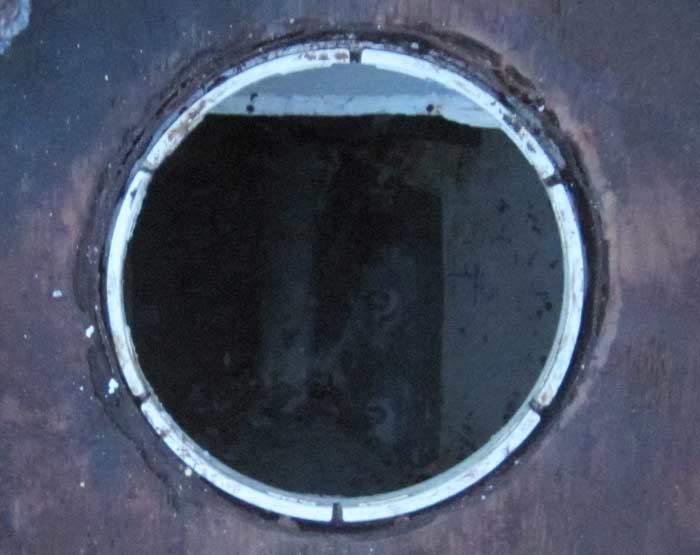
 Fuel Tank Sender
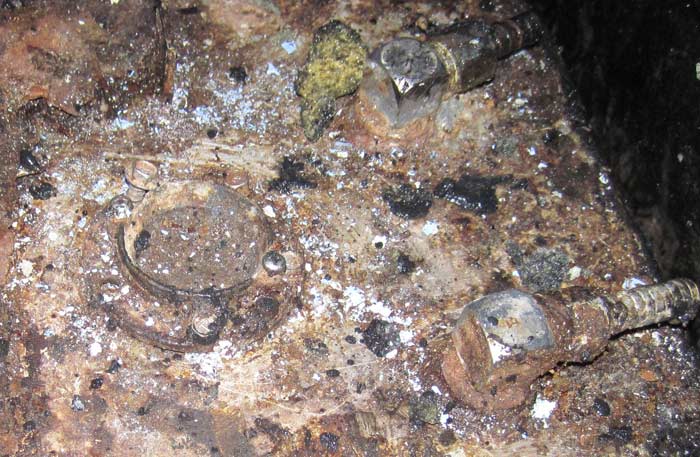
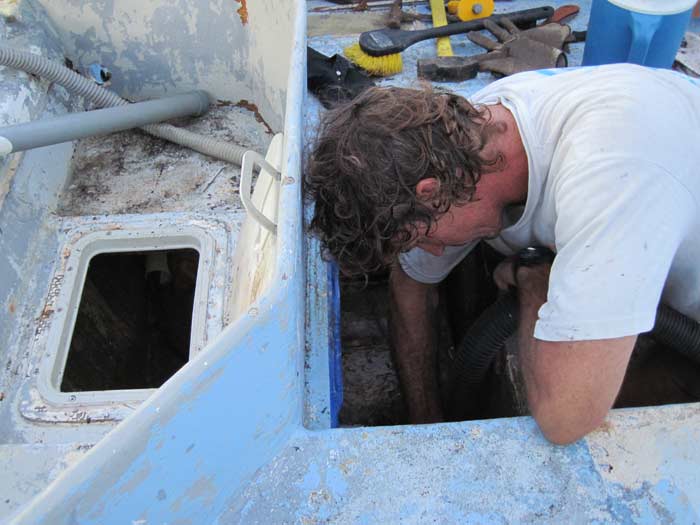
Looking through the deck plate above the aft end of the fuel tank, the photo at left shows about all you could see. A couple of fittings for the engine supply lines and the remains of a badly corroded sender. The sender is loosely attached with a few different flavors of screws, some partially driven at interesting angles. There are also holes where screws are supposed to be. It is no wonder they were having problems with this tank.
In an outrageous burst of optimism, it occurred to us that there was a chance that the sender was the only problem with the tank. We might not need to cut up the whole deck and remove the tank if that were the case, so we decided to cut a section above the aft end of the tank for further inspection.
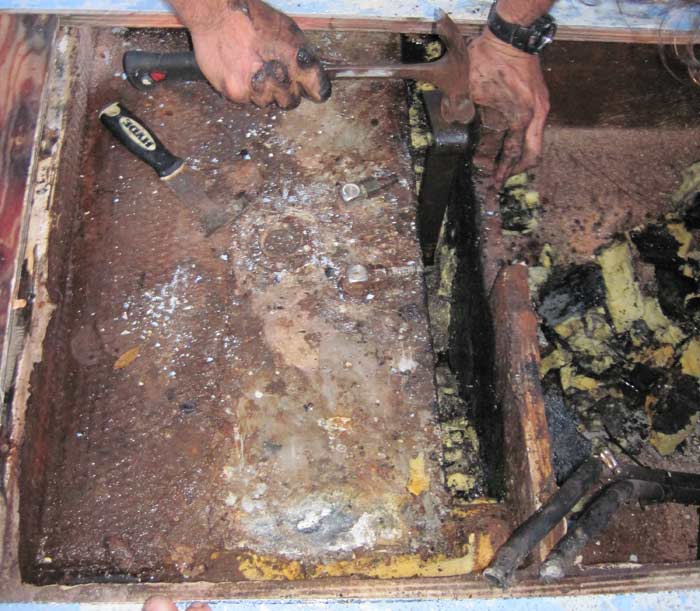 Deck Section Removed
The news did not get better when we opened up a section of the deck. The white spot near the bottom of the picture is an area of corrosion with a significant amount of metal lost. The rest is very dirty, but not really all that bad. The problem was, we both knew that it was not safe to assume that the one little spot was the only bad spot on this tank. It had to come out.
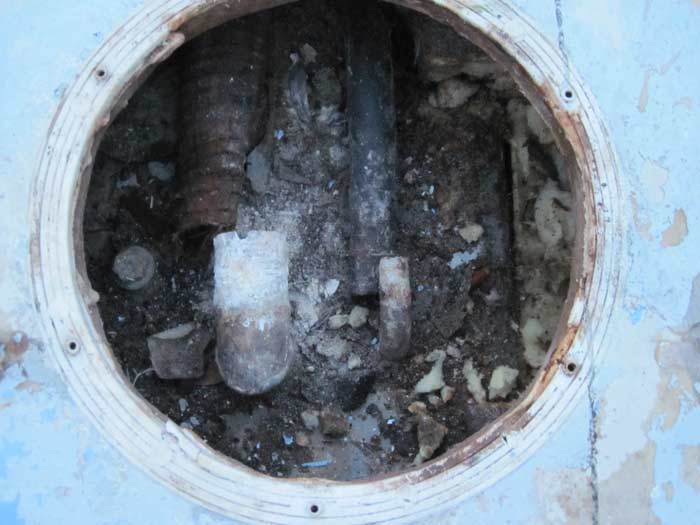
 Underside of Deck Plate
Before continuing with the tank removal saga, a few notes on boat construction. The photo at left shows the underside of the round deck inspection plate that was above the aft end of the fuel tank. It is likely that the hole was as big as the plastic ring at the time of manufacture, but it has grown over the years. People step on them, they get sun baked, and eventually water finds its way through deck fittings. Plywood edges must be carefully sealed against this water intrusion, or the plywood will soak up water and start to rot. This fitting was leaking a bit of salt water onto the (leaky) fuel tank sender every time a wet diver stood over it, which was very frequent. Some of that water was absorbed along the way by the plywood, making the problem worse over time.
 Forward Deck Plate Hole
The picture at right shows the top side of the matching forward deck plate hole. In this case, the plastic ring has already been removed. This one did not appear to have leaked into the plywood, possibly because it spent many years under the fixed bench seats, where no wet divers walked or dripped on it. Still, the steel-reinforced fuel fill hose is doing what those hoses do: the steel wire is rusting through the rubber. Down at the tank hose barb connection, the steel contact has caused some corrosion. Salt got in here too over the years. The hull to deck joint was damaged in the area where the fuel fill is located, so it probably got in that way, if not others as well.
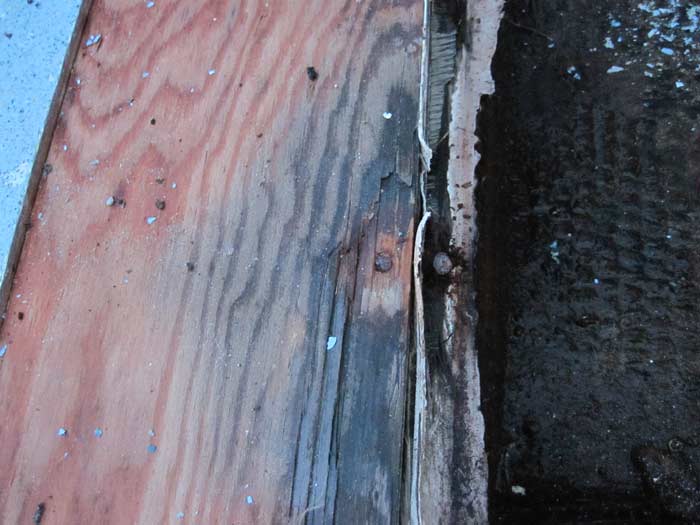 Plywood Deck Core Seam
Things are about to go from bad to worse, so let me preface this part by saying that I really do like these Privateer Renegade boats. They are well suited to the whale diving tours, and even though these have some problems, they are the best available boats for the price. It is hard to make money in the boat building business, and I understand that costs need to be controlled at every step. I am not a professional boatbuilder, just a guy who has played with and broken a lot of boats. If these boats were hopeless junk, I would suggest that we smash them with the backhoe, haul the pieces to the dump, and start over.
With that in mind, the picture at left really disturbs me. It shows a piece of the deck where two of the plywood core sheets join above a floor joist. There are several things wrong here. Working from left to right, the fiberglass laminate (painted light blue) still on top of the adjoining piece of plywood looks awfully thick to me. In the center is the seam itself. Those are galvanized nails, or at least the identifiable pieces that we got out looked like they had been galvanized nails. Also shown is a bead of white caulk on top of the floor joist. Apparently, the attachment method was to squirt a big line of caulk on top of the floor joist, drop the deck sections into the goo, squeeze the ends together and nail. This is not exactly what I meant above by saying that exposed ends of plywood need to be sealed. I meant sealed by saturation with polyester resin or epoxy.
The result of this construction technique is predictable. Of course salt got in there at some point, and now the nails are rusty, the plywood is rotten around the edges, and the floor joist below is rotted out. I use the term floor joist instead of some nautical term because what was left of these things looked like ordinary two by fours. They were tabbed to the stringers with fiberglass roving, which also extended over the top of the tank. More on that in a bit, but what this picture tells me about the boat overall is that no plywood deck core seam is safe. All are suffering from rusty nails and unsealed plywood edges.
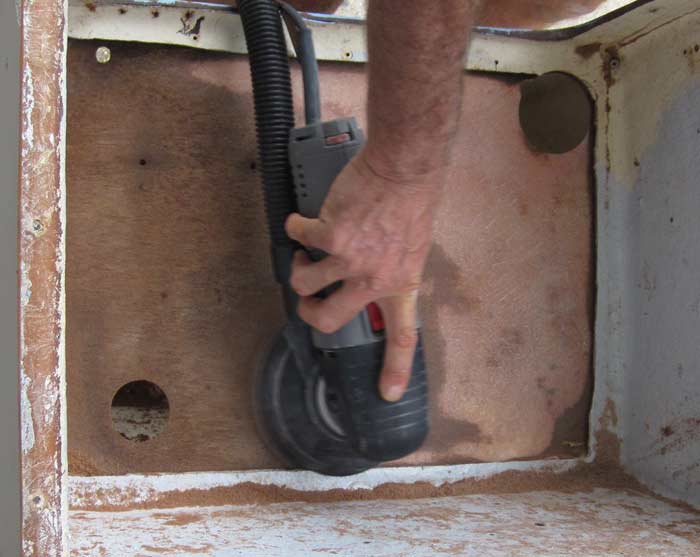
 Smoothing Deck
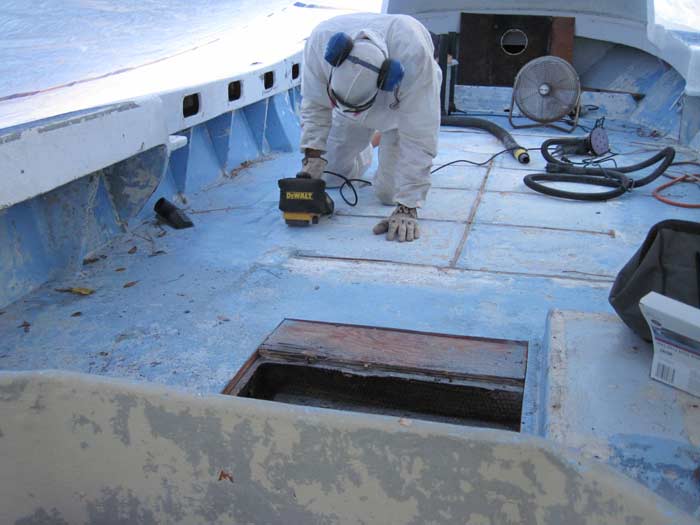
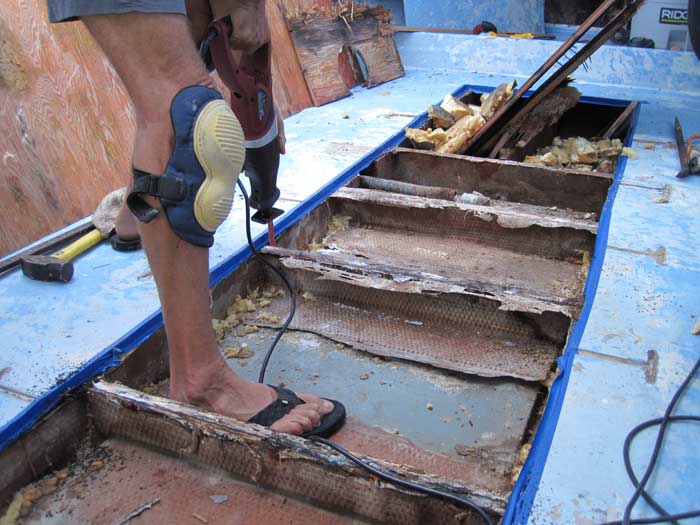
And now, a couple of my favorites from my "Spaceman Attacks Boat Deck" series! Before cutting up the deck, Gene went over it with the orbital sander and belt sander to smooth out the ridges left behind when cutting the bench seats free. We figured those would catch the circular saw and make a smooth cut difficult.
 Cutting Up Deck
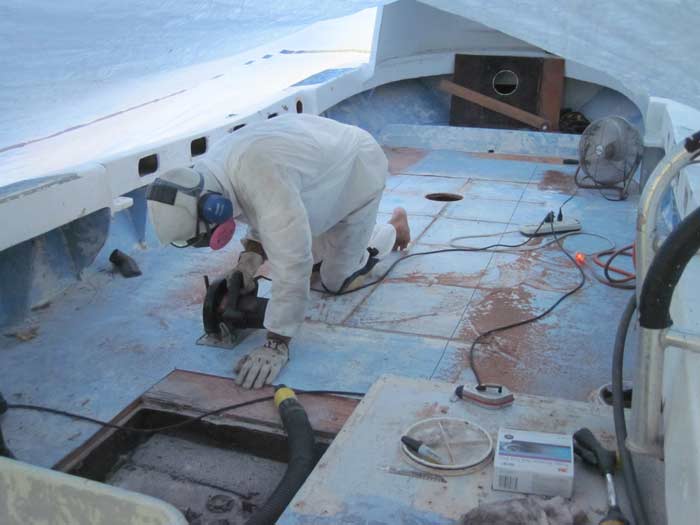
When we were kids, we used to cut and sand fiberglass in our shorts and t-shirts. We would wind up itchy. As you can see, these days Gene wears a hood, hearing protection, eye protection, breathing protection, a full Tyvek suit and gloves. Yes, he is still barefoot. You can't take that out of a Florida boy. He still wound up itchy, but he managed to follow the chalk lines all the way around.
 Final Deck Cut
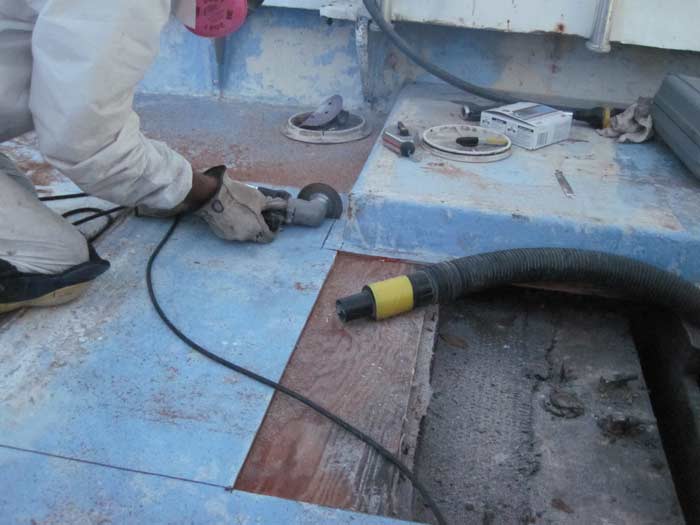
With the perimeter cut out using the circular saw, all that remained was to cut free the corner area made unreachable by the driver's deck. The Roto Zip made short work of that one, and the deck was free, except for being nailed and caulked to underlying floor joists. We grabbed the end of it and gave a pry and a tug, but it did not seem to want to come up without a fight, and we were all out of fight for the day. We really wanted to see what would be revealed when we removed the deck, but that would have to wait until the next day.
 Smashing Rotten Plywood Core
August 3, 2011
Removing Deck and Fuel Tank from Pec
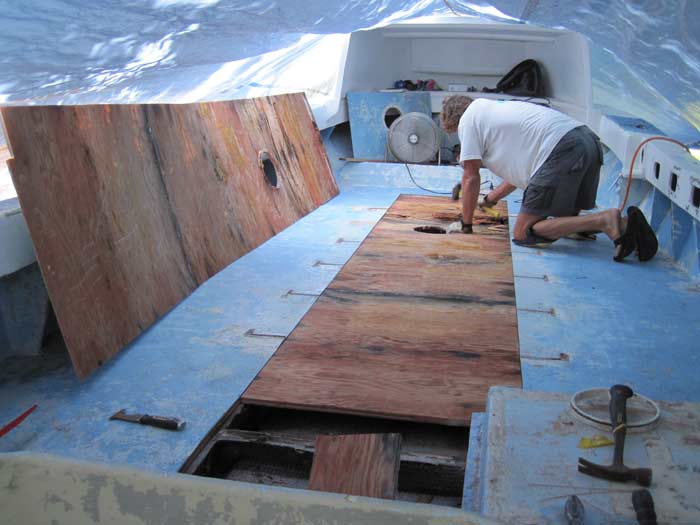
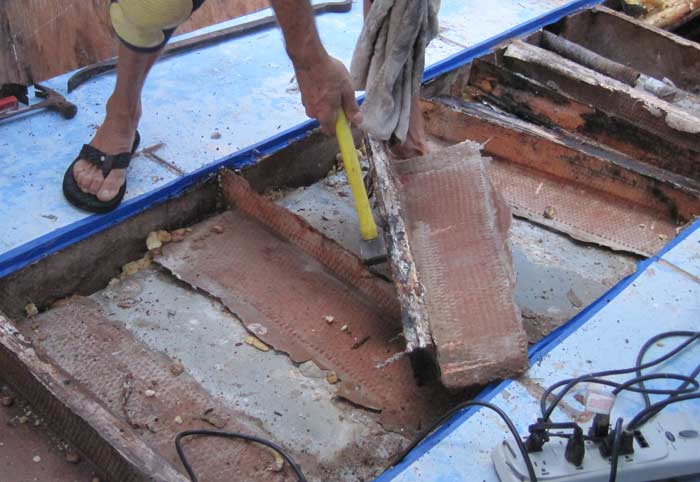
The first order of business this day was to remove the fiberglass deck skin where it had been cut out the day before. No pictures because I heard some hammering over on the boats and came over to see how it was going and found the deck skin standing along the side of the boat and Gene smashing rotten plywood with the Mighty Mini sledge hammer. We had cut forward of the tank a couple of feet because my feet and ears told me that there was rotten deck core underneath and replacing a 12 foot section is pretty much the same job as replacing a ten foot section of cut up deck.
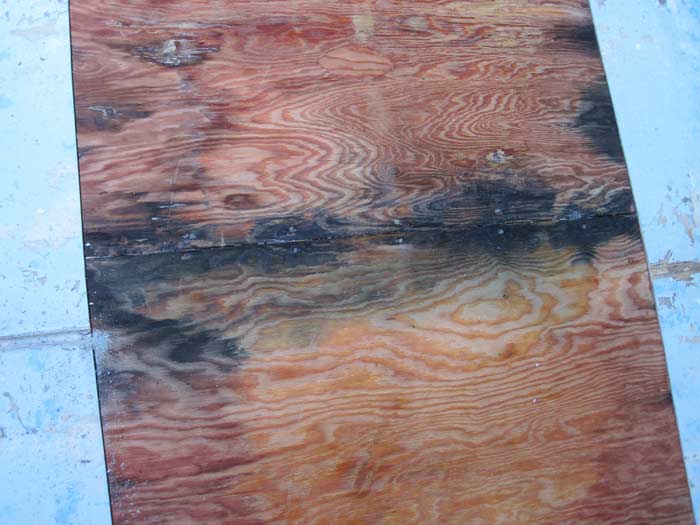
The polyester resin used to lay up the deck adhered only to the surface of the plywood, so it took off a nice print of the wood underneath when it came up. You can see the black seam where two pieces of plywood core butt together both on the plywood deck and printed on the underside of the deck skin. The area of deck core where Gene is pounding rotten plywood is near to a deck inspection plate, but it appeared that the source of the water in that area was elsewhere, out along the sides of the boat. There are a couple of spots where the damage to the core extends to starboard of the line we cut, and a bit of further cutting in those areas is probably going to be required.
 Plywood Seam Closeup
Here is a closer shot of the joint between two plywood deck core pieces. The staining in the wood indicates to me that the actual source of the water is again the sides of the boat, and the water was just using the ends of the plywood, softened up a bit by the rusty nails, as a path to travel. Other than the two deck plates over the fuel tank, there are no penetrations of the deck skin, and the forward deck plate did not appear to be leaking yet when it was removed. At least, it was not allowing water around the plastic ring and into the wood. The fitting itself was old and worn out enough to leak, but that would expose the tank below to water, not the deck core.
 Rotten Core Removal
With a convenient hole in the forward section of deck core, Gene got out the gloves and prybar and started loosening plywood from the caulk and rusty nails that were holding it down. One of the surprising things to me was that the caulk actually stuck to the rotten 2x4 crossbeams better than it stuck to the plywood, even where the ply was in fairly good condition.
 Center Deck Removal
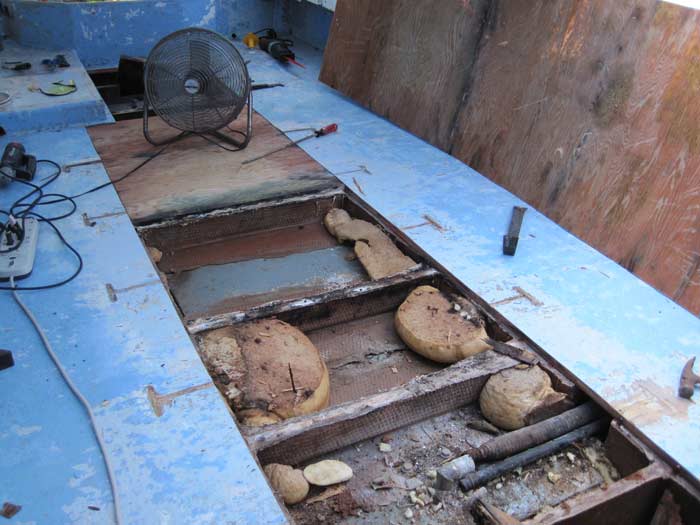
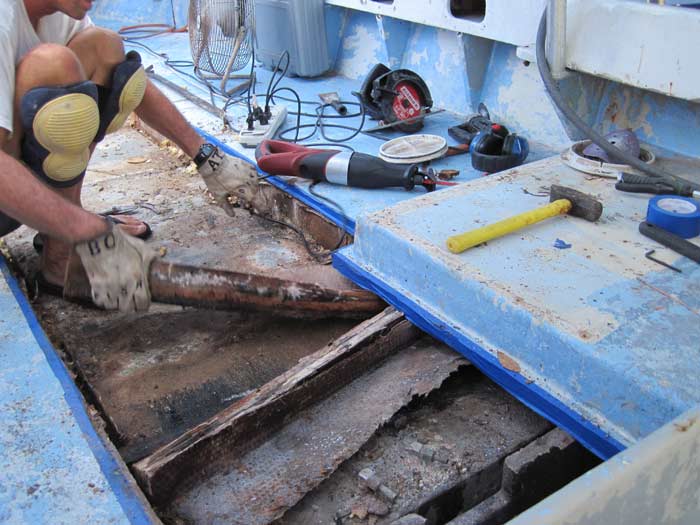
Most of the plywood pieces came off fairly easily, but the final cut last night at the corner under the driver's deck did not quite get it and that area had to be cut a bit further before it let go. You can see in this picture that the plywood decking was laid on while the foam was still expanding, and in several places the foam expanded around the top of the tank. It did not stick to the plywood above very well. The end of the foam bubble on the tank top (lower right corner of picture) has been cut to allow passage of the fuel tank fill hose. The cut does not look like it was done from above, but rather was done by someone with a long, skinny arm reaching through the deck plate.
 Initial Foam Removal
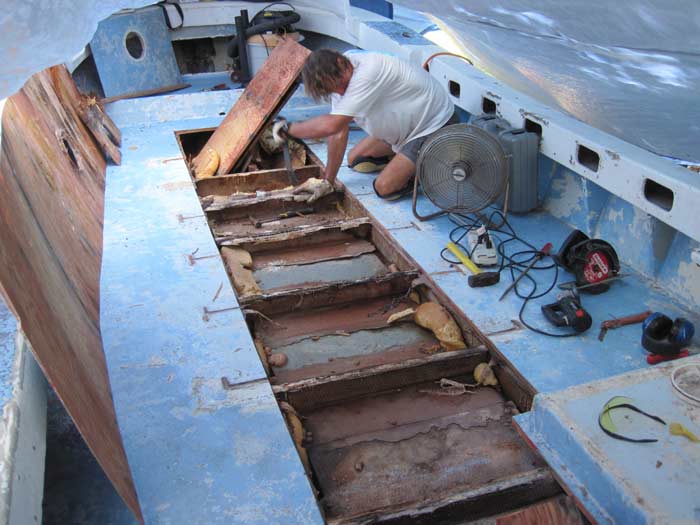
Once the last piece came up, we started in on chipping away the foam, particularly where it was going to interfere with making an easy Sawzall cut where the floor joists are tabbed to the stringers. The boards may be rotting, but they are still strongly tabbed in place on both ends. Over the tank is a different story. For some reason, they ran fiberglass roving across the top of the tank itself. This was a terrible idea in my opinion. The fiberglass did not adhere to the aluminum anywhere, but it did provide a place for salt to accumulate.
 Salt Mine Under Roving
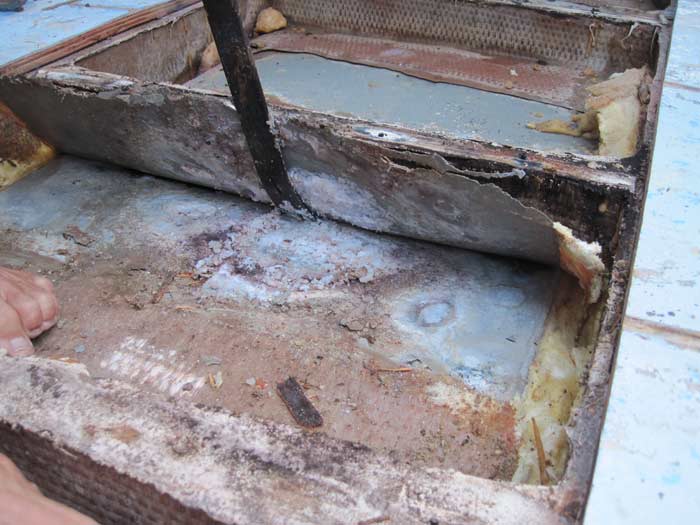
The picture at left shows the worst of those places. Until Gene lifted up that particular section of roving, I was still having occasional thoughts that this tank might be saved. One look at the salt mine under the roving, where a large patch of corrosion had almost eaten through the top, and I thought, oh well, we do not have to be careful with this fuel tank any more. Its life as a fuel tank is over.
 Sawzall Vs Roving
Once the top layer of foam was all out of the way and the cut edge of deck was protected by blue masking tape, Gene got to try out his new Sawzall reciprocating saw from Northern Tool. It did a fine job on the roving that had been used to tab the floor joists to the main stringers. As mentioned, that roving was no longer bonded to the tank.
 Breaking Joists Out
The the tabbing cut free, a smack from the Mighty Mini sledge hammer was all that was needed to free most of the joists and associated pieces of roving.
 Battling Final Joist
The last floor joist piece was a bit more difficult to detach, since it was up underneath the driver's deck and we left that intact. The long blade on the Sawzall made it possible to reach back there and slice the roving, then the piece came out with a few blows from the Mighty Mini. Unfortunately, Gene made a Sawzall cut in the adjacent stringer in the process. One more thing to repair. For the moment, it was just taped over to keep the inside of the cut clean and dry.
 "My Ass Is So ITCHY!"
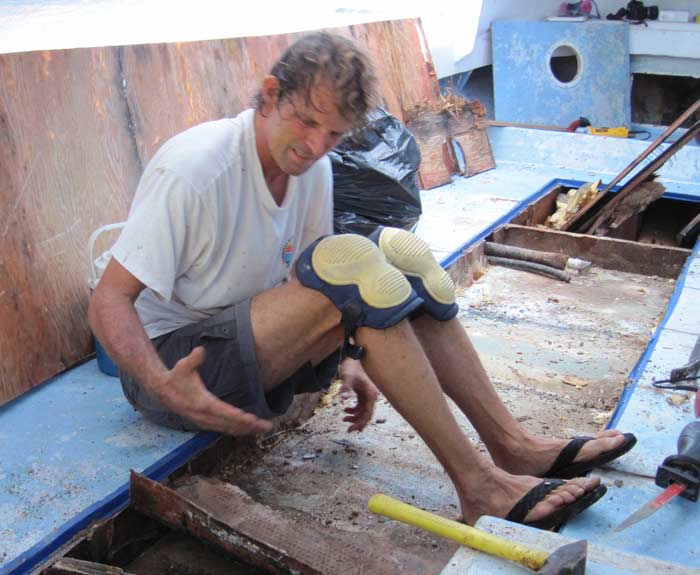
By this point in the project, Gene was suffering from itchy ass from all the cutting and from sitting down in the dust. Maybe the spaceman outfit really is worth it?
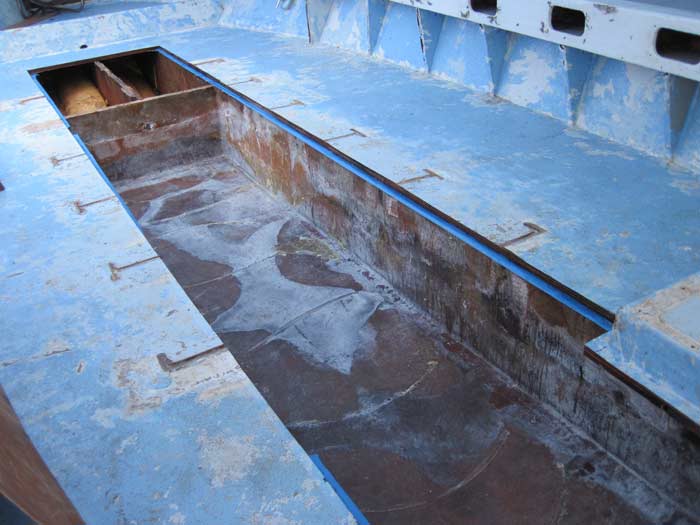
 Fuel Tank Exposed
The top of the tank was completely clear at last, and Gene set to work removing the foam from the perimeter. I took off for a lunch break.
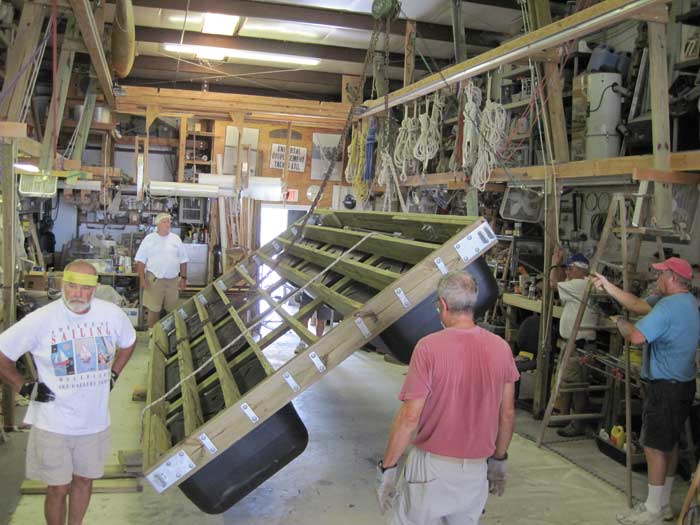
 Fuel Tank Removed
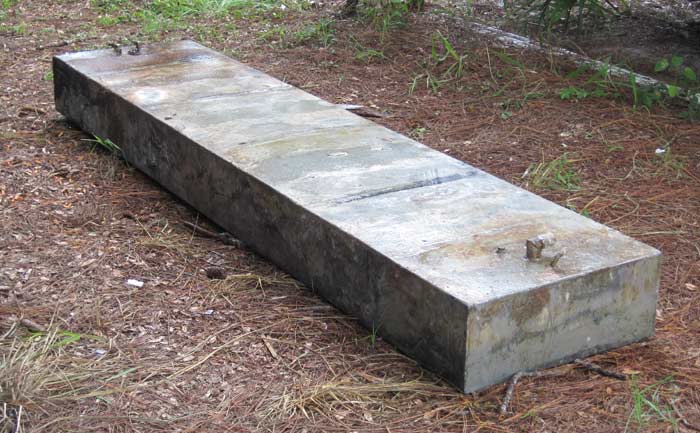
By the time I went back out to check on his progress and see if he needed a hand getting the tank out, I found this on my way to the boat. OK, I guess he got it! A quick inspection showed another salt mine on the bottom side of the tank with significant corrosion. That was exactly the thing I feared we might find, but better to find it here while the boats are on land than out on the Silver Bank with passengers and whales.
 Last of the Tank Foam
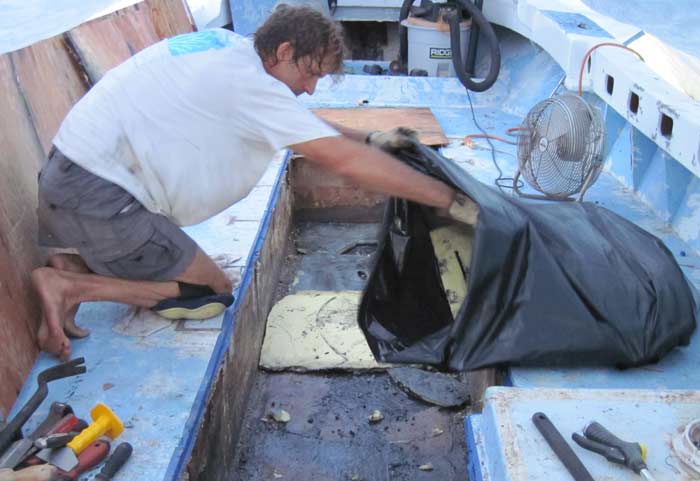
The tank had been suspended above the floor of its enclosure by setting it on about 8 pieces of rubber trim about an inch in diameter, then the foam was poured in and filled the rest of the space. The foam on the bottom, along with occasional pieces of embedded rubber, came up in large sheets and went right in the trash. To my surprise, none of the foam we had found was soaked with absorbed water. It was all dusty dry inside.
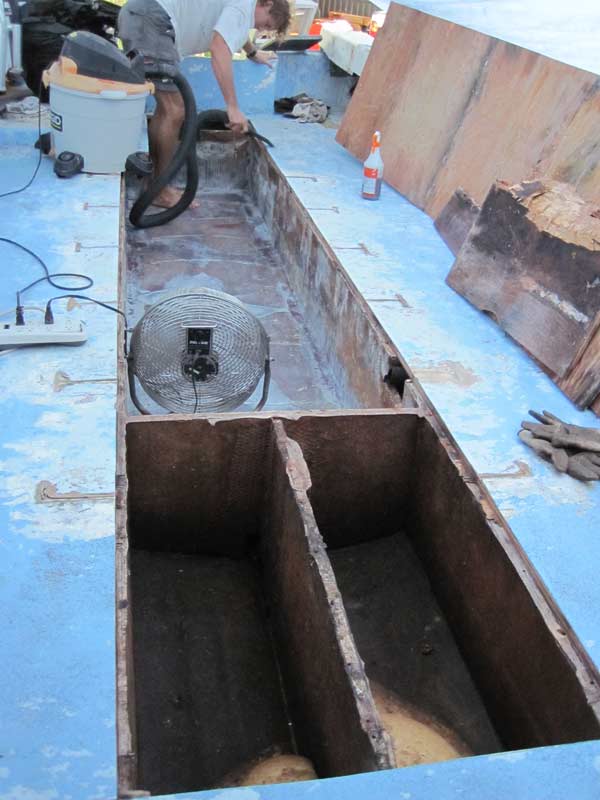
 Sludge Bailing
At last it was down to only the foul-smelling black sludge-water in the fuel tank compartment, and Gene got to work clearing that out with a bailer. We guess there are nasty anaerobic bacteria that live in such places and were combining with salt, mildew, spilled fuel and who knows what else to create the smell.
 Shop Vac Drying
After bailing, the whole compartment got a good rinsing and scrubbing with degreaser. Much of the rinse water was removed with using a manual bilge pump, pumping into the aft bilge area. The last of the water that could not be picked up by the manual pump was dried out with the Shop-Vac.
 Aft Bilge Bath
After using it as a waste disposal site, the aft bilge area got another bath and degreasing, followed by drying and removing the last particles with the shop vac.
 Forward Bilge Cleanout
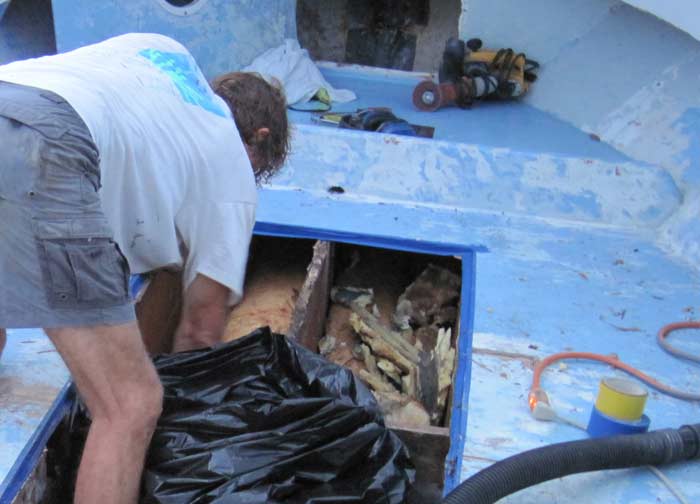
The bilge area forward of the fuel tank compartment had provided a convenient dumping ground for small bits of plywood and foam ever since Gene smashed it open that morning, but the time had come for all of that stuff to go. We filled several large trash bags with the foam and pieces of wood that were too small or deteriorated to be useful.
 Forward Bilge Empty
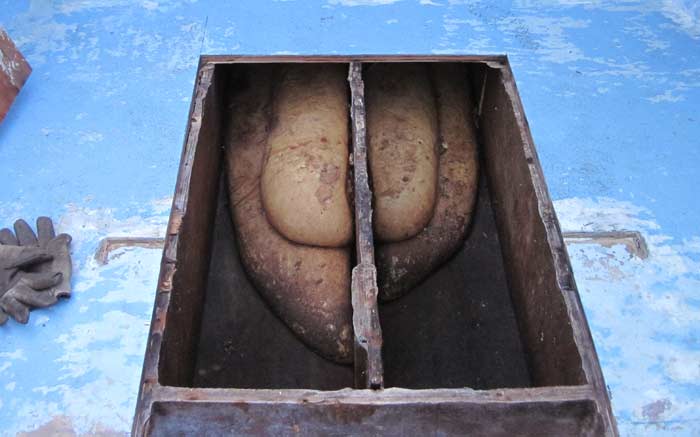
With the bilge compartment empty, you can see that they poured in the foam in two stages, making what look like rising loaves of bread stacked on top of each other on both sides. Other than being dirty and having a few waterlines that are suspiciously high up on the foam, everything looks OK in there as far as we can tell.
 Cleaning Up Work Mess
Hard to believe that this day started with a slice in the deck, became a big, stinky mess, and at the end of the day, the last dust is being sucked from the job site. It was a good day, except for the part about confirming the death of that fuel tank.
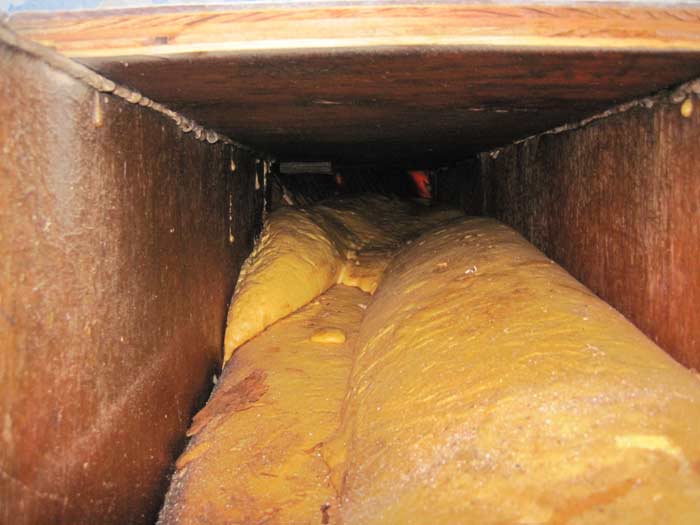 Port Side Bilge Forward
While Gene was busy with the vacuum cleaner, I stuck my camera down inside the bilge to see if a flash shot into the dark hole would reveal anything I could not see with my eyes. Not really. There might be three separate pours of polyurethane foam in there, not two, and unsealed plywood attached with ferrous nails continues to be a bad idea, but other than that, all is as I expected. The spot of light up there is the sun shining through the hull. I did not go outside to see why, but assume it is a previous repair or a place where more paint came off in the pressure washing.
 Sealing Plywood Edges
August 4, 2011
Sealing Plywood Core Edges
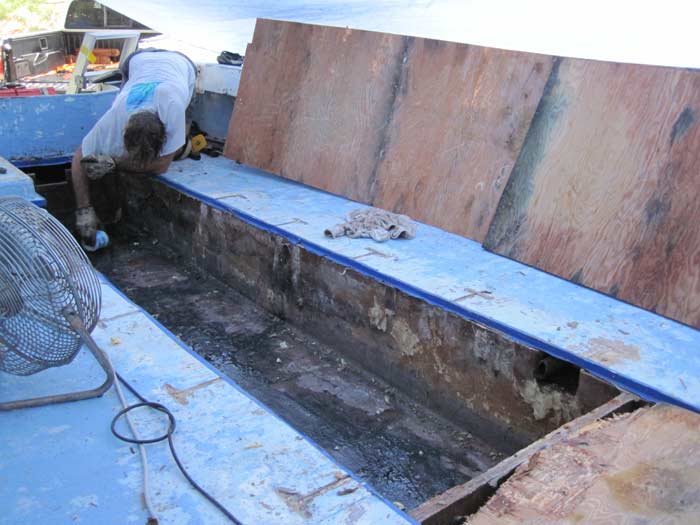
The plywood core of the remaining deck was protected with masking tape while removal and cleanup were ongoing, but that was never meant to last very long. To seal and protect it until new tanks are installed, Gene painted the plywood edges with West Systems epoxy. The tops of the stringers were taped off because those need a bit of cleanup and attention and any epoxy on the stringers will just have to be removed later.
 Floating Dock for IFDS Worlds
August 8, 2011
Repairing Console
I went once again to help the volunteers build floating docks for the IFDS Disabled Sailing World Championships. The dock teams are building 22 floating docks for the event, so extra hands are always welcome.
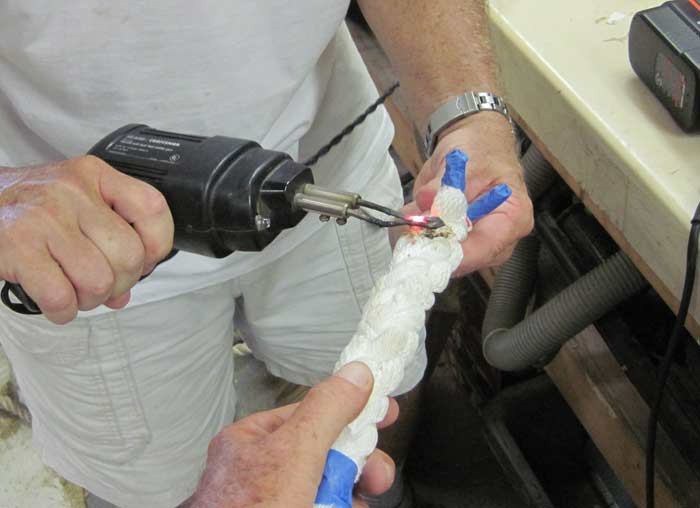 Old Soldering Iron As Hot Knife
We were splicing loops into the ropes being used to pick up the docks, and one of the volunteers demonstrated how you can use a soldering iron (preferably an old one) as a hot knife to cut the spliced ends smooth.
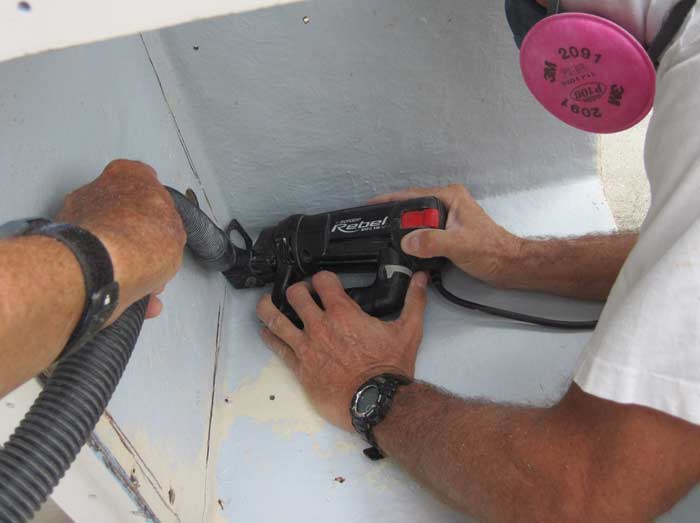 Console Tray Cutting
When I got home, I found Gene involved in sanding down the two consoles to prep them for repairs. He said that one console had wet plywood core in the inside tray. We considered just removing the tray with the Sawzall, but decided instead to cut off the lower skin and repair the core from the bottom side, leaving the upper fiberglass skin of the tray in place. The space was too confined to make the full cuts with a circular saw, so the corners were finished with the Roto Zip spiral saw. The wide kerf of the spiral saw means it throws a lot of dust, so I was holding a shop vac extension near the action while Gene made the cut.
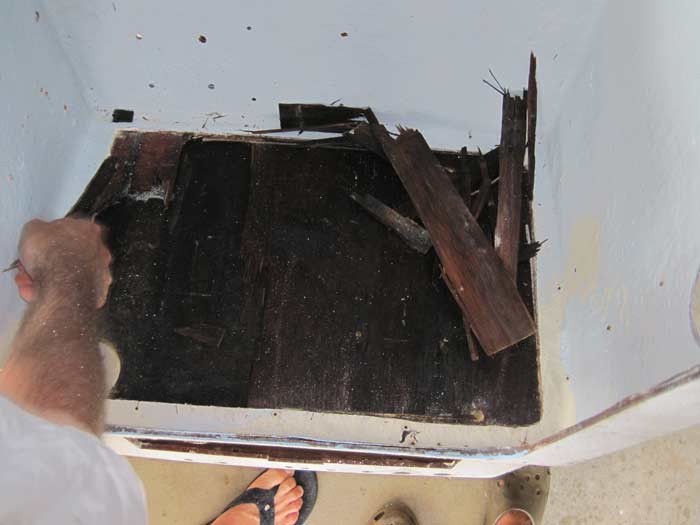 Console Tray Rotten Core
Removal of the lower skin revealed wet, black plywood. It was rotten and weak enough that most of it came up without a major fight, but the bits around the edges were troublesome. The plywood delaminated from itself more easily than from the fiberglass, so it came up in torn layers.
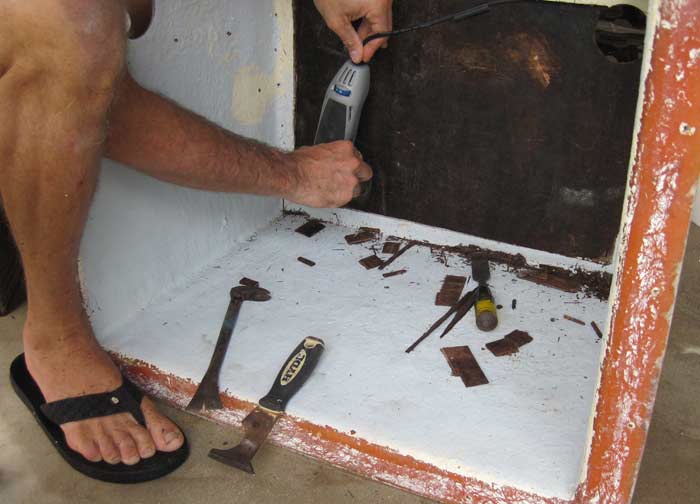 Console Core Edge Removal
Around the edges, the core was harder to remove because we did not remove the lower skin all the way to the edge. We found that it was easy to separate a section of core using the Dremel MultiMax, then pick it out of there using a paint brush roller cleaner and small pry bar. The core still attached to the upper skin has been chiseled down smooth, but did not want to delaminate from the fiberglass.
 Sanding Console Core
Instead of trying to scrape the last layer completely clean, Gene just sanded it with the orbital sander and a rough pad. The sander quickly removed the rotten, black wood, leaving behind a very thin layer of wood that actually looked pretty nice. Once that was sanded off, only pink fiberglass remained.
Our plans for the next day involved removing and selling the remaining engine, then cutting the bench seat off the deck of Fluke, cutting up the deck, and removing the fuel tank. That's another long day, so it's time for a new project page. Click the link to continue to Part III!
Leave a Reply
You must be logged in to post a comment.